Why You Should Install WordPress on Google Cloud
Google Cloud offers a suite of services that allow you to host your website or application on the search giant’s data centers. With Google Cloud, you can access this hardware in the form of Virtual Machines (VMs).
Unlike a standard virtual machine or Virtual Private Server (VPS), cloud hosting services use a collection of machines to store your data. This is termed ‘the cloud’ because it’s highly scalable. You can always add more resources to your cloud, making it ideal for high-performance projects.
Opting for cloud hosting with Google Cloud gives you all the usual benefits of cloud hosting and more. As you might expect, Google Cloud uses top-tier infrastructure, making it a strong choice.
In contrast to its competitors, Google Cloud Platform (GCP) is somewhat more cost-effective. Additionally, Google Cloud offers a $300 starting gift card, valid for 3 months.
Thanks to its easy integration with other Google services, you can use various marketing tools more comfortably and fluidly (such as Analytics, Firebase, etc.).
The Costs of Using Google Cloud
If you’re not completely new to site management, you’ll have an idea about hosting costs. You can find excellent hosting plans starting at $5 a month with a long enough contract.
At this pricing, you typically get shared servers. However, you can also find unmanaged VPS starting under $10, but these usually require some server management knowledge.
Google Cloud uses a pricing strategy similar to some VPS hosting providers. It charges you hourly for the resources you use. For example, running a standard machine with 1 CPU and 4 GB RAM costs $0.0475 per hour, or $24.2725 per month.
At this price point, you’re in the same range as many managed WordPress web hosts. However, there’s a significant difference. Managed hosts often provide a multi-app experience, handling all advanced configurations for you. On the other hand, Google Cloud allows you full control over your cloud.
Using non-shared resources, your website can perform better. Plus, with full control, you can optimize your website more effectively, potentially improving your search engine rankings due to faster site performance.
Moreover, if you know how to configure your machine, you can get significant discounts with Google Cloud. Additionally, just by registering, you can receive free credits – we’ll cover this in the next section.
How to Install WordPress on Google Cloud in 3 Steps
Installing WordPress on Google Cloud is a bit more complex than with other web hosts, but it’s not as daunting as it seems. Let’s get started right away!
Step 1: Deploy a WordPress Instance
First, you need to sign up for Google Cloud. Setting up your account will take just a few minutes. After gaining access to your console, we recommend verifying your account using your bank or credit card.
Google Cloud offers a free trial for its services, and by just verifying your account, they will give you $300 worth of credits to use in your projects:

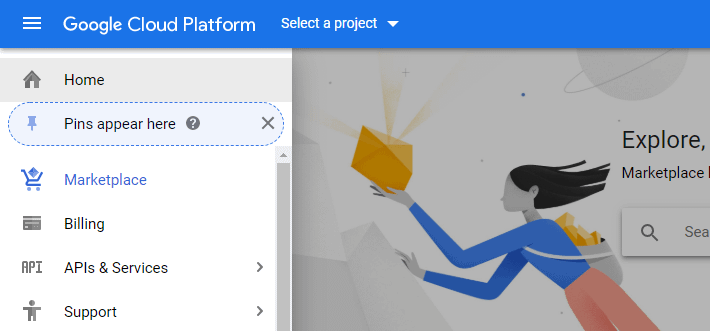
Whether you decide to sign up for the free trial or not, the rest of the process is nearly the same. Start by going to your control panel, accessing the menu on the left, and then selecting the Marketplace option:
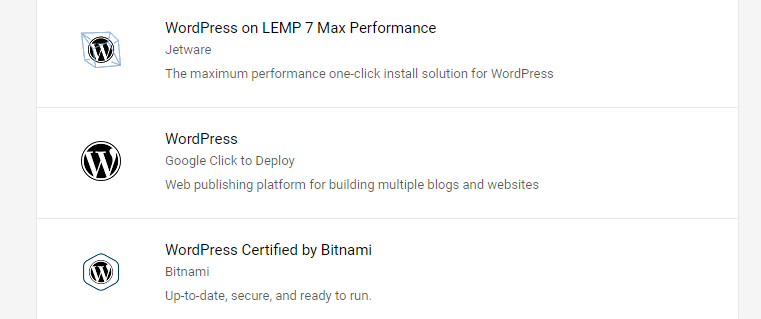
On the next page, use the search feature to look for WordPress; this will give you a list of ready-to-deploy WordPress configurations available with a few clicks.
Scroll down until you find the WordPress option with the subtitle Google Click to Deploy:
When you select it, you’ll get an overview of the estimated costs and the stack used by the package:
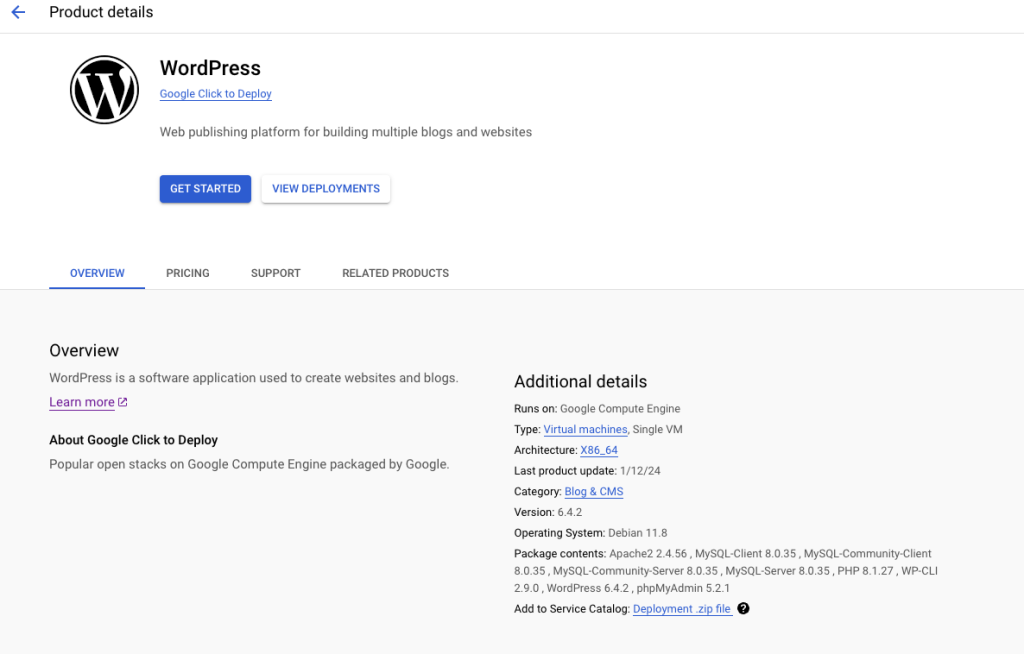
With this stack, you get 1 CPU and 2 GB RAM, and the estimated cost is about $13.61 per month (you get discounts for full usage every month). This includes 20 GB of storage space, which is sufficient to run a website with a moderate amount of traffic without any difficulty.
When you’re ready, click on GET STARTED and continue to configure your setup.
Step 2: Create and configure your new project
After pressing the Create button, give the service a few minutes to set everything up.
While waiting, you’ll have the opportunity to change the configuration of your new Google Cloud instance.
In the last section, you saw some cost estimates. Now, you have the chance to modify every setting that could increase or decrease your costs.
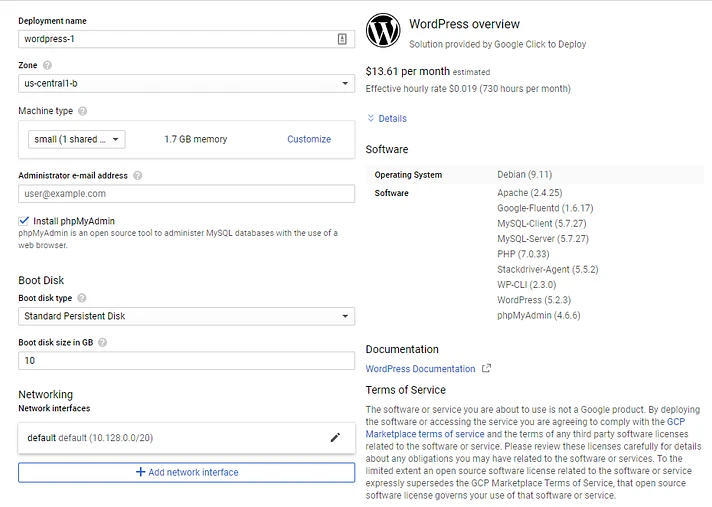
As a general rule, you wouldn’t want to use less than 2 GB of RAM for your cloud instance. Also, the default configuration for this setup uses a shared CPU. If you’re concerned about performance, we suggest setting the Machine type to 1vCPU with 3.75 GB of memory.
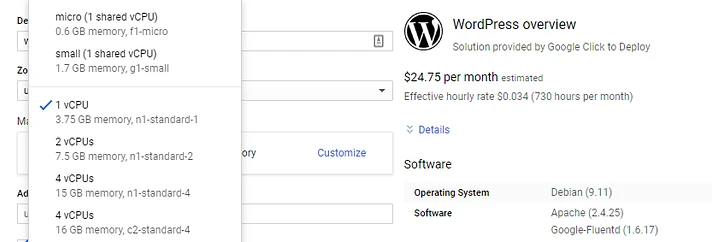
With this setup, you’ll raise your monthly costs to $24.75 before discounts. We also recommend changing the Boot disk type from Standard Persistent Disk to SSD Persistent Disk for higher performance:

The default 10 GB of storage space should be sufficient for most websites. With this setup, your fee will rise to approximately $25.97 per month.
Before proceeding, make sure you have:
- Chosen a region for your server.
- Checked the option to Install phpMyAdmin.
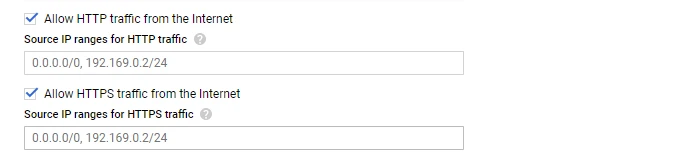
- Enabled both HTTP and HTTPS traffic.
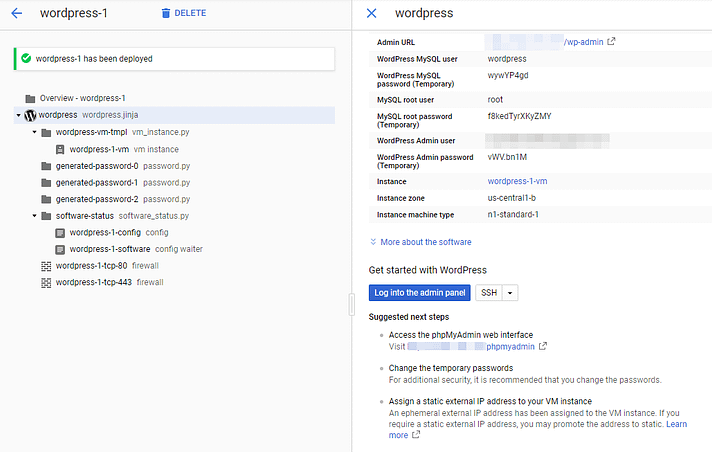
Now press the Deploy button and wait for Google Cloud to do its job, which can take a few minutes. Once everything is ready, you can check your new setup credentials on the deployment page:
Step 3: Map a Domain Name and Set Up an SSL Certificate
Your website is now up and running in the cloud, but there are a few things to review before ending the day. Currently, your site is only accessible via an IP address, so you’ll want to map a custom domain name to your site as soon as possible. If you don’t already have a domain name, you can purchase one from any domain registration service – you can find some tips for choosing a good domain name here. Afterward, since you enabled HTTPS traffic, you’ll need to set up an SSL certificate for your website. This step is not absolutely necessary, but we strongly feel about encouraging the use of HTTPS, as Google does. After completing these tasks, check your billing costs to make sure your free credits haven’t run out. Once they do, Google Cloud will start charging your chosen payment method at the end of each month.
Conclusion
If you’ve only used ‘traditional’ hosting providers so far, trying out cloud services can be a big change. The pricing model and hosting configuration options make this option very different from others. Still, using Google Cloud to host your WordPress website can be beneficial if you need highly scalable plans. Here’s a recap of how to install WordPress on Google Cloud in three steps:
- Deploy a WordPress instance.
- Create and configure your new project.
- Map a domain name and set up an SSL certificate.